

Terraform State File Management (Part 1: local)
Introduction to Terraform State file and local backend


Introduction
Terraform is an open source infrastructure as code (TaC) tool created by HashiCorp that allows you define both on-prem and cloud infrastructure in code. One of the critical component of the terraform configuration is the terraform state file. The state file represents the current state of your infrastructure and its integrity/availability are crucial to maintain your infrastructure in code.
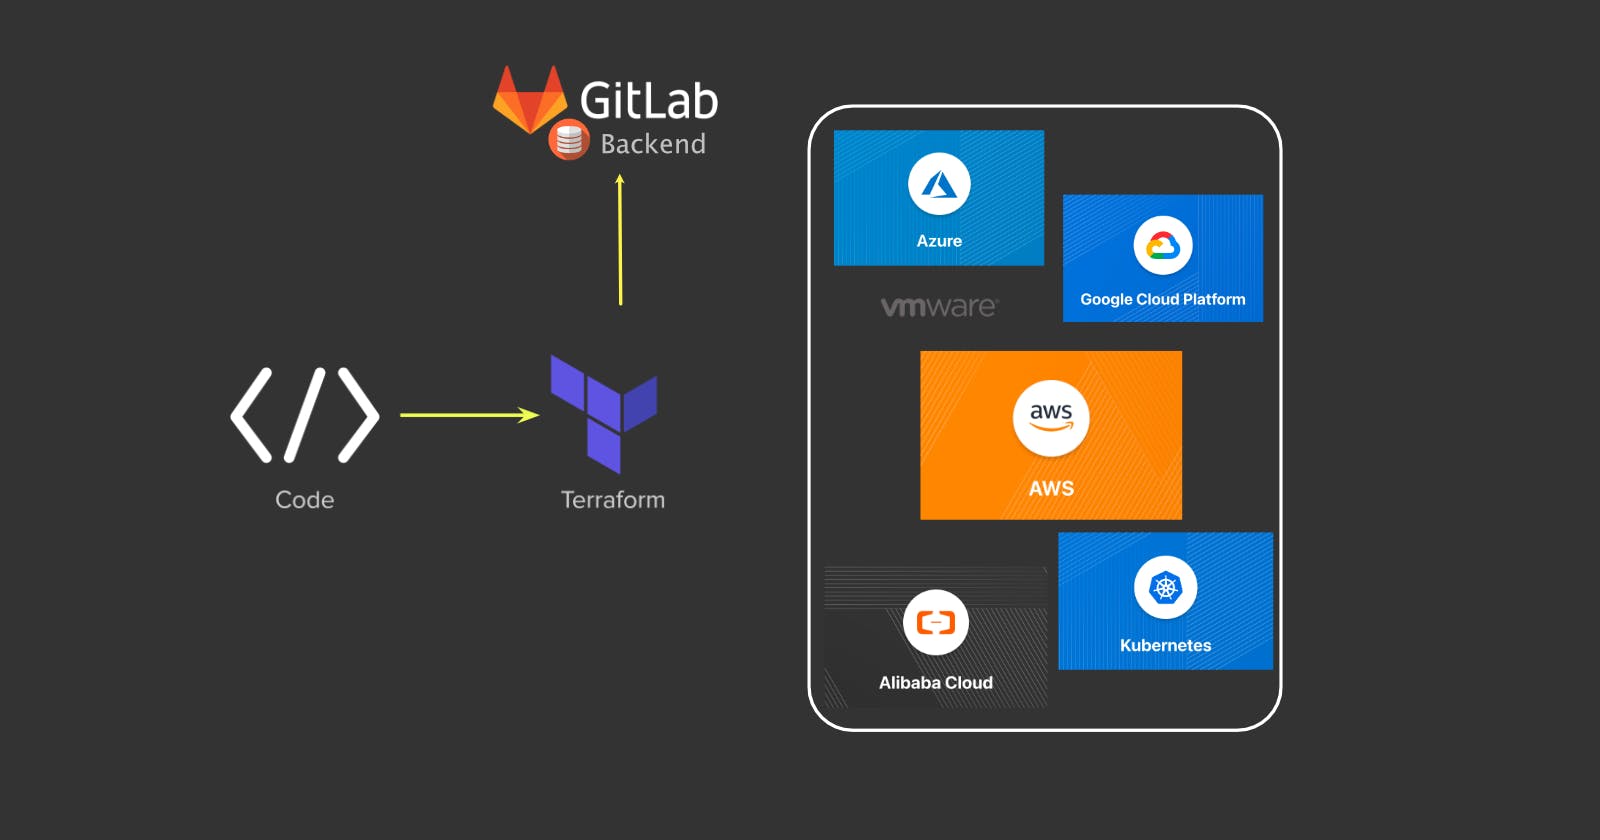
In this two parts post, you will learn how to migrate a terraform state file from a Local Backend to a GITLAB Remote Backend to ensure its integrity and availability.
What is a Terraform state file?
Terraform state file is a json file that stores the current configuration state of an infrastructure deployed through terraform. Anytime you run "terraform plan" or "terraform apply", the state file details are matched against the actual infrastructure and the different determines if a resource(s) must be removed, added or updated.
By default Terraform uses the local backend to store the state file locally in your computer working directory. Please note this does not require any configuration on your part and the state file default name is "terraform.tfstate"
Limitation of local backend
Due to the criticality of the state file, a locally stored state file represents single point of failure in any eventually of your computer becomes unavailable. In addition, a local state file prevents you from collaborating with other team members on the infrastructure management.
Remote Backend
To overcome the limitations of local backup, Terraform has a feature called Remote Backend. This feature allows you to store your terraform state files on an alternative remote and mostly redundant storage. Commonly used remote backends are cloud storages (e.g. S3, GCS, Azurerm ) and http backends.
State Locking
State locking is another feature in terraform that protects a state file from being corrupted or being out of sync by locking the file during a terraform plan or terraform apply stage. This ensures only one person is modifying the infrastructure at any given time.
Initial terraform configuration with Local Backend
We will start by defining a basic terraform configuration that will be used to create one AWS VPC and one IGW resources. This configuration will store the infrastructure state file in our current working directory
Let's create the following four terraform configuration files locals.tf, main.tf, vpc.tf, outputs.tf
- locals.tf: Contains some local variables and you can update them as your please.
# AWS region and credential
locals {
  aws_region = "us-east-1"
  aws_credential_file = "/Users/komlaetou/.aws/credentials"
  aws_profile = "elolo-gen-0"
}

# VPC details
locals {
  aws_vpc_cidr = "10.222.0.0/16"
  vpc_tag_name = "terraform_lab"
}

# Other tags
locals {
  provisioner_tag = "terraform"
  creator_tag     = "m.komlaetou"
}
- main.tf: Contains the terraform version, providers, aws region and credential.
# Terraform version & Providers #
terraform {
  required_version = ">=1.0.0"

  required_providers {
    # AWS provider
    aws = {
      source  = "hashicorp/aws"
      version = "~> 3.0"
    }
  }
}

# AWS Region & AWS credential #
provider "aws" {
  region                  = local.aws_region
  shared_credentials_file = local.aws_credential_file
  profile                 = local.aws_profile
}
- vpc.tf: Containstwo resources to be created (vpc & igw)
########################
# create a VPC
#######################
resource "aws_vpc" "vpc" {
  cidr_block = local.aws_vpc_cidr

  tags = {
    Name        = local.vpc_tag_name
    Provisioner = local.provisioner_tag
    Creator     = local.creator_tag
  }
}

########################
# create an IGW
#######################
resource "aws_internet_gateway" "igw" {
  vpc_id = aws_vpc.vpc.id

  tags = {
    Name        = "${local.vpc_tag_name}-igw"
    Provisioner = local.provisioner_tag
    Creator     = local.creator_tag
  }
}
- outputs.tf: To return the created vpc and igw ids.
# VPC id output
output "vpc_id" {
  value =  aws_vpc.vpc.id
}

# IGW id output
output "igw_id" {
  value = aws_internet_gateway.igw.id
}
Now navigate into the working directory where you have the above configuration files and run the following four commands in the sequential order.
- auto format your terraform code
terraform fmt
- initialise your terraform module
terraform init
- preview resources that will be created
terraform plan
- create resources
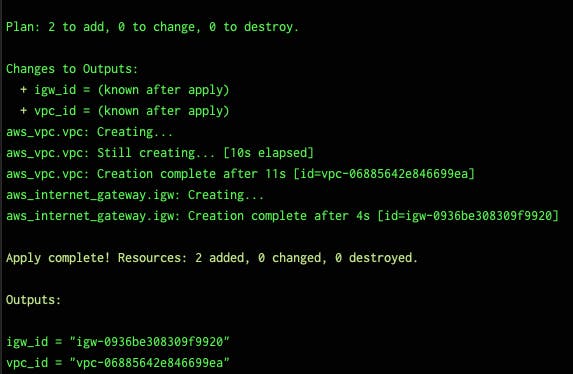
terraform apply --auto-approve
Successful resource creation will return a similar output
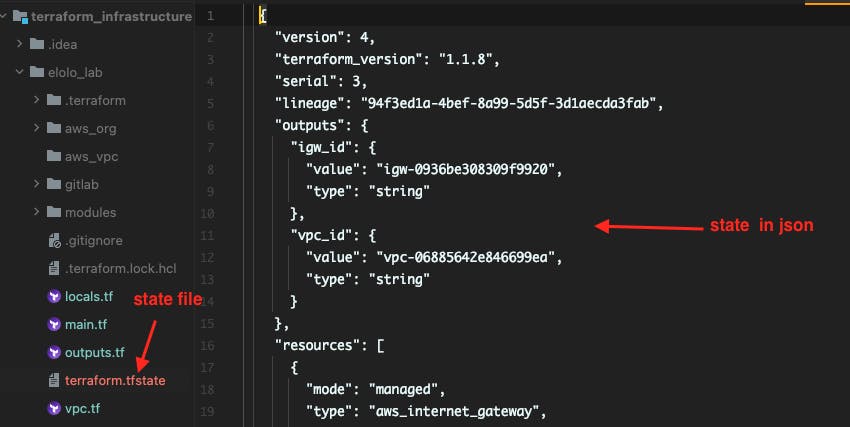
In the working directory a new file named "terraform.tfstate" is created.
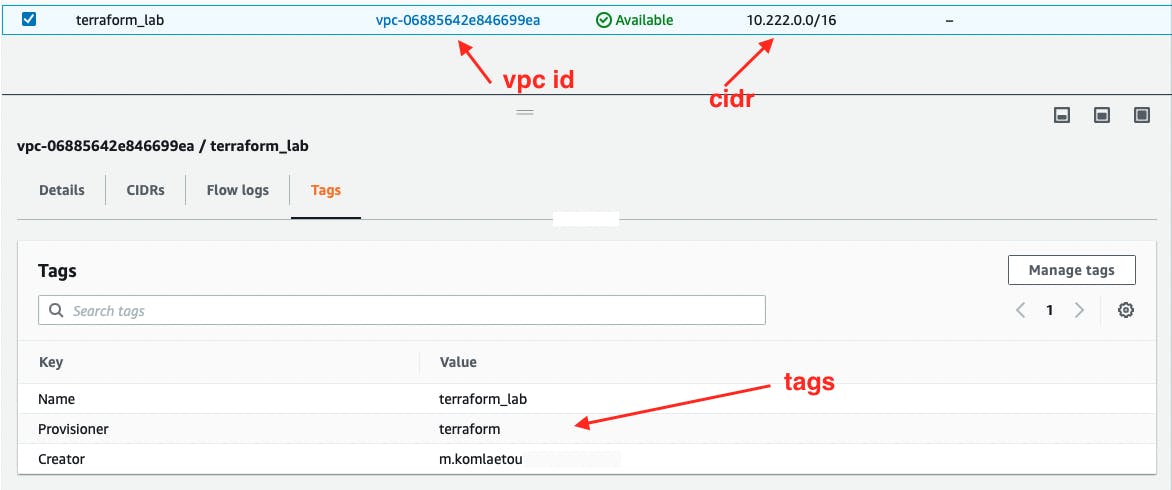
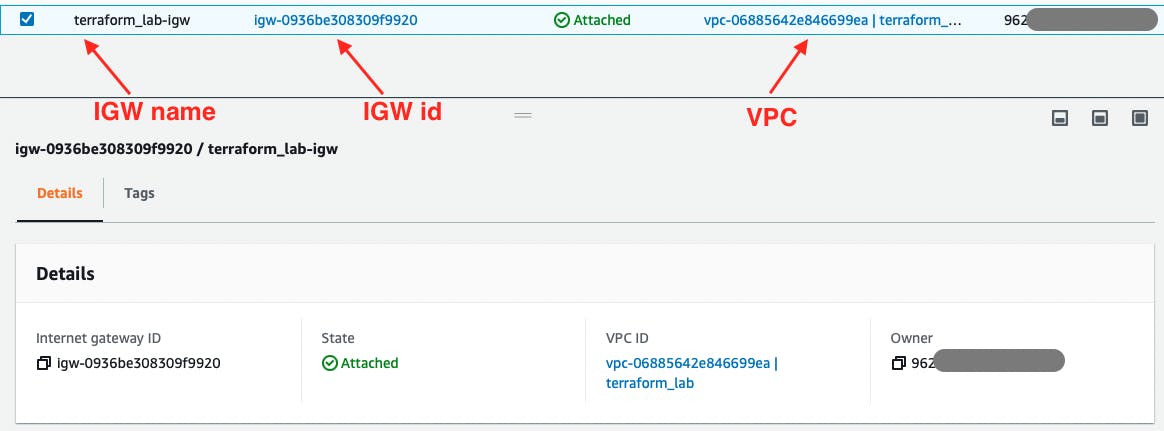
In the AWS web console, you can confirm the created resources.
Part 2: Gitlab Backend State File.
💥💥💥💥 Happy Terraforming ! 💥💥💥💥💥💥