


Installing Terraform like a Pro on a MACOS using Tfenv
Tfenv & Provider Plugin Cache


Install “tfenv” tool
We will install terraform using an opensource tool called “tfenv”. This utility allows us to install multiple versions of terraform and switch between versions based on our terraform code compatibility requirement. Note that “tfenv” installation requires “brew” to be available on our computer first.
Depending on our CPU architecture, we can use one of the commands below to install “tfenv".
# Intel CPU
brew install tfenv

# M1 silicon
arch -arm64 brew install tfenv
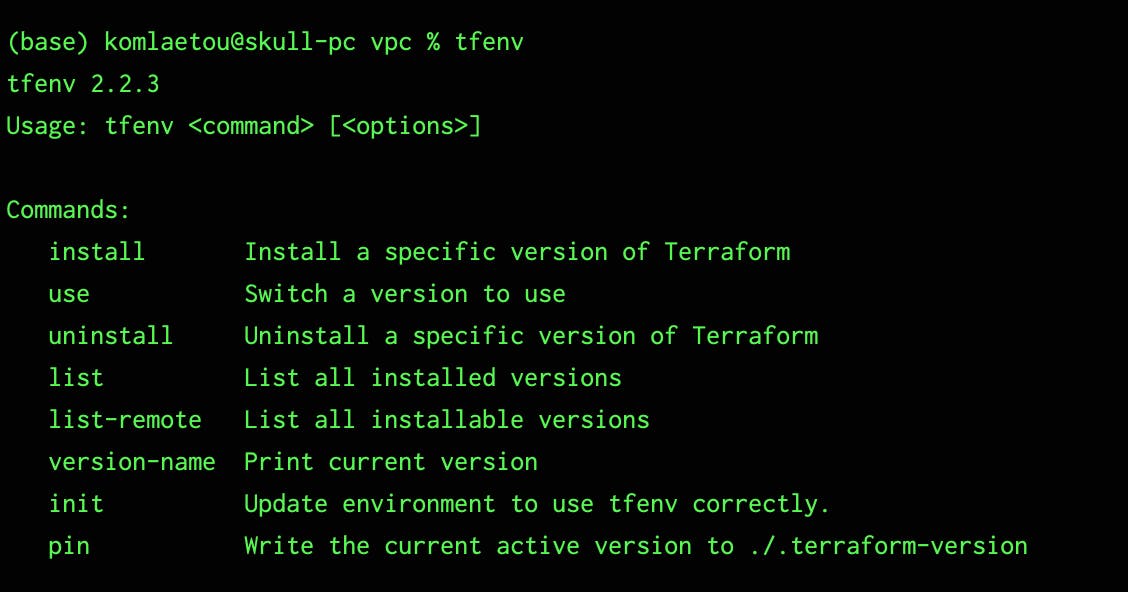
To check the various commands available with tfenv utility, simply run “tfenv"
Installing Terraform
Now we are ready to install terraform. First, let’s check the terraform versions available to install using the command “tfenv list-remote”. This will return all versions of terraform ever existed.
tfenv list-remote
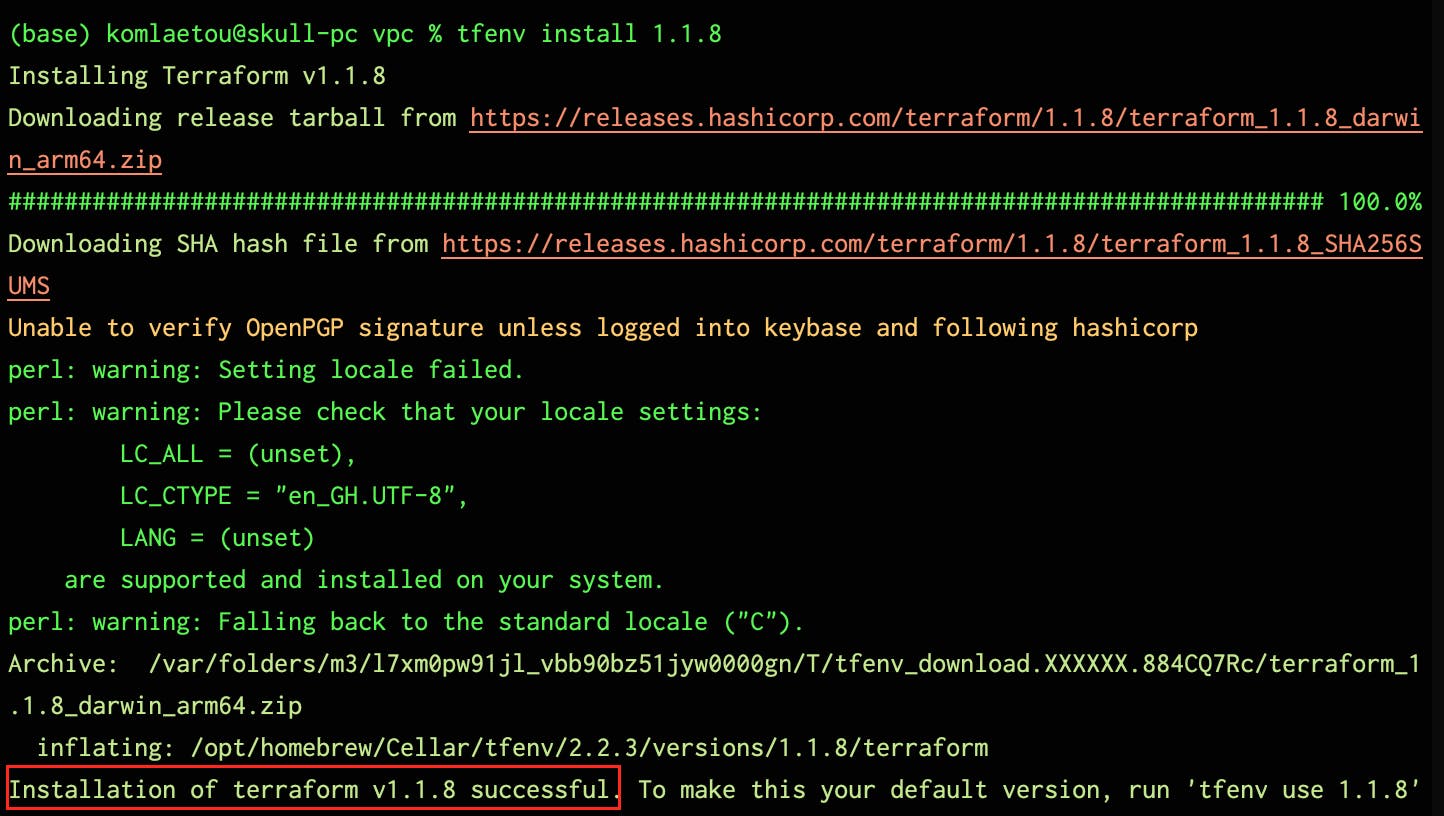
In this example we are going to install terraform version 1.1.8 which is the latest stable version at the time of this tutorial by simply running:
tfenv install 1.1.8
The final step of the installation is to make this version 1.1.8 the preferred or default one by running the command
tfenv use 1.1.8
Just in case we want to confirm the version of terraform we are currently using, we can issue any of the following commands.
tfenv version-name

# or

tfenv list

# or

terraform version
Configure Terraform Provider Plugin Cache
Provider Plugin Cache configuration enables us to share downloaded providers across modules. This helps prevent multiple downloads of providers binary anytime we execute "terraform init" in very directory or module folder. Given that provider plugins can be quite large (on the order of hundreds of megabytes), this will save us a lot of disk space and bandwidth.
Step1: Let’s start by creating the directory in which Providers binaries will be stored
mkdir -p ~/.terraform.d/plugin-cache
Step2: Create the CLI configuration file which will be a hidden file in your home directory name “.terraformrc”. In the file we will set the value for Plugin Cache directory. Simply use the command below to achieve that.
echo 'plugin_cache_dir = "$HOME/.terraform.d/plugin-cache"' > ~/.terraformrc
NB: CLI configuration file is a per-user settings , which apply across all Terraform working directories. https://www.terraform.io/cli/config/config-file#provider-plugin-cache
Now we can quit and relaunch our terminal or IDE, navigate into our various terraform directories, delete all “.terraform” directories and then run “terraform init”.
One key observation is that the “.terraform” directories will be recreated but when we drill down to the providers directories, we will notice they are just symbolic links pointing to the real binaries in the ".terraform.d/plugin-cache” directory. You can also run “du -sh” to confirm the insignificant size of your terraform directories.
Uninstalling specific Terraform version
We can simply run "tfenv unistall to install a specific version of terraform
tfenv uninstall 1.1.7

Happy Terraforming !